SIMPLE SETTINGS FOR THE TARANIS
Taranis using open TX, F3J and F5J basic thermal settings, these will get you in the air,
For sophisticated F3x/F5Jsettings go to http://www.rc-soar.com/opentx/setups/f3j/index.htm
For information on OpenTX go to
http://open-txu.org/
To bind your RX see
https://www.youtube.com/watch?v=YTneUV2TdZM
https://www.youtube.com/watch?v=YTneUV2TdZM
For a video guide see https://www.youtube.com/watch?v=trU4kZwAM7E
This is a video I did of me setting one aileron with differential and crow braking, I can not multitask
Servo calibration, this should be the first step see
http://www.rc-soar.com/opentx/setups/calib/calibration.htm
Settings
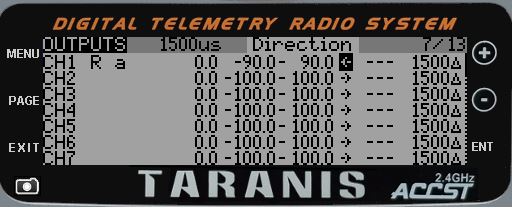
If the setting is plus, the wing surfaces go up, reverse servos on page 7 to do this
Channel numbers are the same order as Futaba,
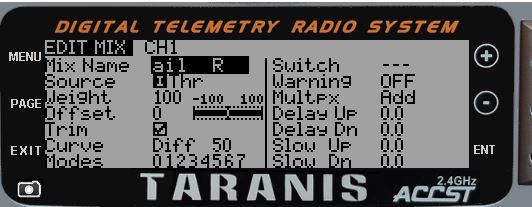
Below the setting for RH aileron in channel 1, adjust the weight to the correct amount for your model
Reverse the servo if needed on page 7
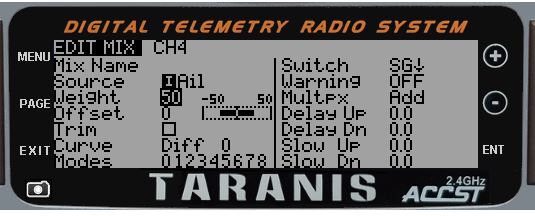
Channel 1 Line one: basic aileron stick to RH aileron with 50% less down aileron,
use the same settings for the left hand aileron , reverse the weight setting so that the surface goes up when the aileron stick is moved to the left
We use minus weight and not servo reverse as other additions are to be added
Below, the servo travel has been reduced to 90% in both directions to stop
the servo binding in the up position and the value matched in the down to keep
symmetry
The servo has also been reversed
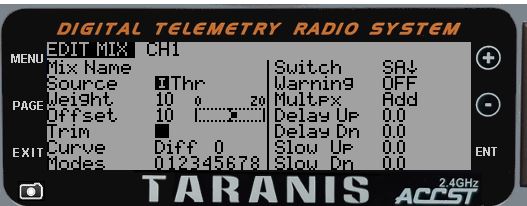
Line 2 for RH aileron and left aileron, Crow brake, aileron goes up as the the throttle stick is pushed forward when switch SA is down, trim is off
reverse offset if you want stick down for brakes, here I have used switch SA to arm the brakes, change to your usual switch
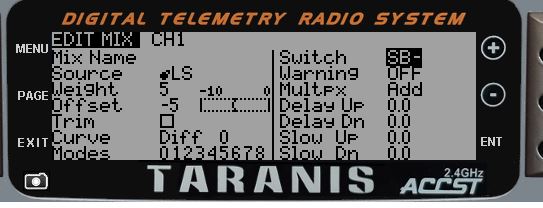
line 3 is for camber, lowering the trailing edge (thermal mode), lowering the LH
slider lowers the trailing edge when switch SB is in the middle position, trim
is off
any input may be used like the throttle lever, change switch to your choice
If you want a fixed amount use: source = max, weight 5, adjust weight and match
offset
Also apply this mix to the RH aileron
see page 3 for a better camber mix
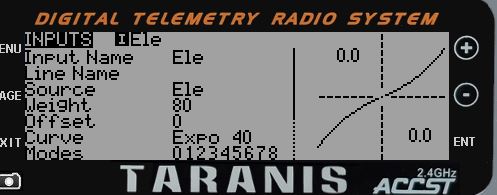
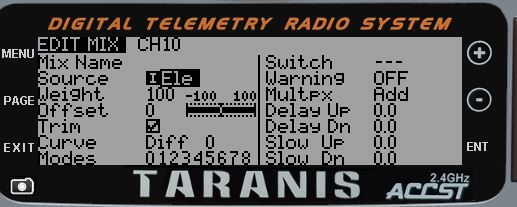
Elevator on Channel 2 - If using V tails these mixes will go to channel 10 see below
primary mix
weight is set at 100% trim is on, adjust control rod to avoid using trim, so that the expo will stay centred

Movement is controlled on the input page 4, rate reduced to 80% with 40% expo
Line 2 for the elevator brake compensation, this puts in down elevator as the brakes are deployed ( apply mix to channel 10 for V tails)
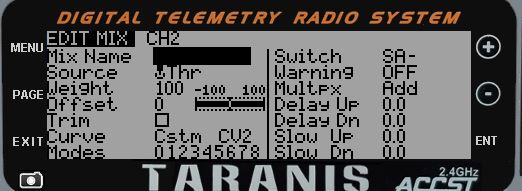
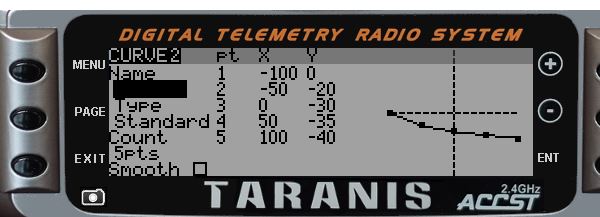
This is on a curve as it is not linear, this would be reversed for pop up brakes, adjust the curve points as needed to cancel out pitch change when brakes are deployed
leave this page on when flying, apply full brakes and adjust point 5, half brake and adjust point 3, then the other 2, elevator brake compensation is usually around 30% of normal elevator movement
It is possible to configure the throttle trim to adjust the brake compensation with the Mike Shellim clever mix (multiply the the brake lever by the throttle trim and add the result to the elevator see page 2)
Check you can apply down elevator when the brakes are full on
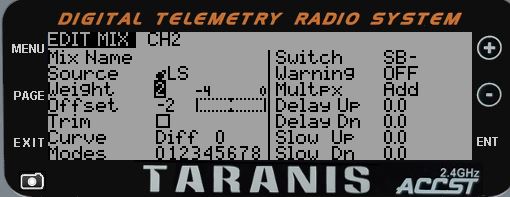
Line 3 is for elevator flap compensation, if needed; 4% down elevator is applied as the camber is used
Throttle elevator compensation would be the same but using the throttle as a source
Flaps on channel 5 & 6
This gives full down flap when the throttle stick is pushed forward while
switch SA is on ( SA should have the down arrow not the middle as shown)
Adjust the end points and centering on page 7, do not adjust the mix, you can
use a curve to get the effect of half brake on half deployment and also to
get the two flaps to match their travel
The first half has more effect than the second half
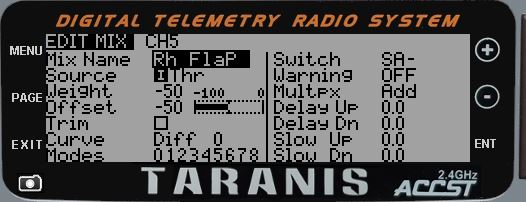
This is the second line for the flap channels - camber, the flap goes down 10% when the LH slider is lowered while switch SB is in the middle position, you could change the source to throttle or another adjuster
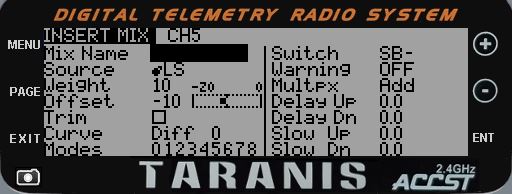
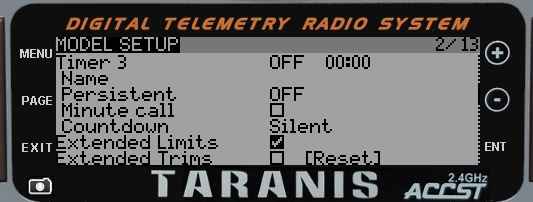
to get the large movement extended limits are used, page 2
Also a large amount of sub trim 50% and the servo travel is increased to 120% channel 6 will also need it. Page 7
Servo arms are installed so that the aileron can go up more and Flaps more down than up
Neutral point of the servo gives 30 degrees down flap,
Below extended down travel for the flaps, reverse and sub trim on page 7 also set the second flap
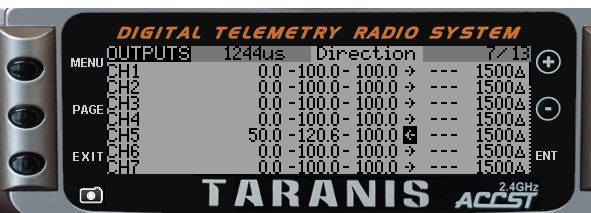
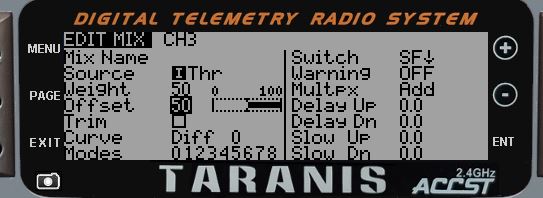
The Throttle, this is on Channel 3 controlled by the throttle stick and switch SF
100% sub trim is used so that the throttle is off with no mix
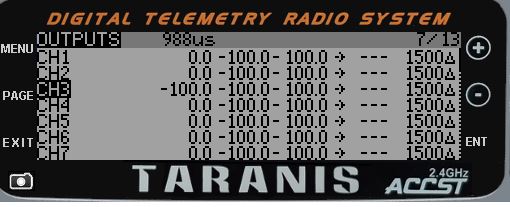
This is the mixer page, , 50% on weight and offset, no trim, this is engaged
when SF is forward
You could replace the the throttle stick with a slider, or just use a switch:
Input max , weight 100%
There are many ways to control the throttle, this is just one
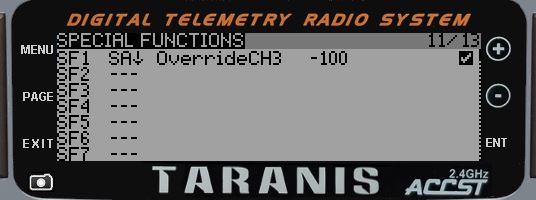
To stop the motor coming on when the brakes are armed, an override is used on page 11
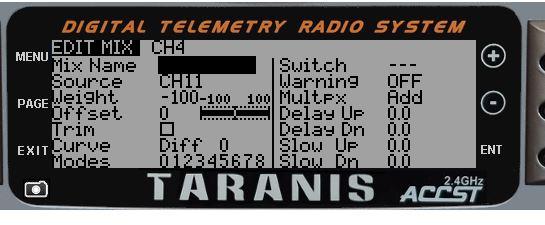
The rudder is on channel 4. Adjust control rod for centering to keep symmetry, you may need some expo on the input page
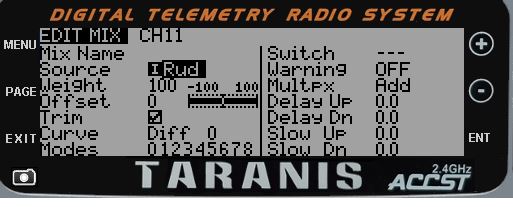
Use channel 11 if you have a V tail
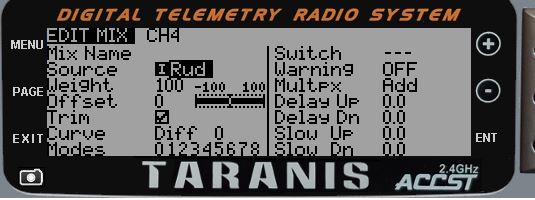
second line: coupled aileron to rudder mix, 50% with trim off, switch used is SG but you can use any switch, or leave it on all the time
This should get you in the air, but double check before launching
Vee Tail Mix
For Vee tails you need high channels, this makes it easier to add later elevator compensations
Elevator input goes to channel 10
Rudder input goes to channel 11
one half of the V tail gets it elevator value from channel 10

2nd V tail gets its elevator value from channel 10
1st V tail gets its rudder value from channel 11, reverse weight to get correct direction
2nd V tail gets its rudder value from channel 11, reverse weight if needed
V tails often need rudder differential, I use 30% less up than down, apply rudder in the air and check for pitch change
aileron to rudder mix now goes to channel 11 and elevator compensations go to channel 10
See taranis2.htm and
taranis3.htm a better aileron diff, adjustable brake elevator
compensation and a better camber control, variable rudder coupling
Sticky switch for a timer and secure throttle taranis4.htm