Back to Tips Page

Repairing a broken fuselage (from Andy Westgate)

1. Clean up the break ...but don't take too much damaged material away at this stage....it will help you re-align the fuselage. Clean all dirt and grit out and sand with 80 grit inside the fuz and outside

2. Easy fix:- get a carbon fishing rod, fishing pole section or similar that matches the inside diameter and epoxy in place....making sure everything is straight and true.  If you can't get a rod to match then cover the larger half of the fuz with parcel Tape and use a wax or polish to make it  a non-stick surface. Now make a bandage with epoxy resin and medium thickness glass cloth. Once this is dried slide it off (or gently prize it off). Cut it length ways so it slides inside the smaller end of the broken fuz....rough it up and fix in place. Once this has gone off join the two halves together in the same way.


Fishing pole about to be inserted

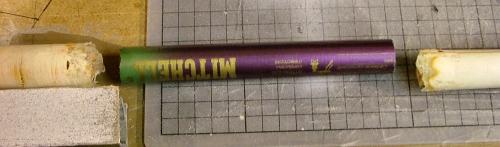
Fishing pole section about to be fitted

Image showing fishing pole inside fuz

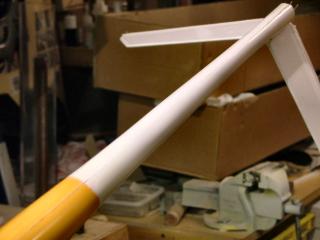
2:- Fishing pole section  inside the fuselage.
Pole section shown in red  

Image showng section to grind away

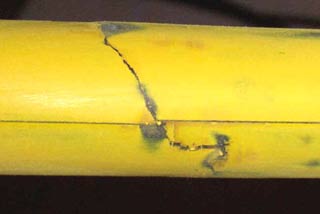
Once it is all set and strong grind away all the damaged material and scarf the fibre glass carefully beyond the rod infill....don't go too thin. 

Image showing new bandage round fuz

Now wrap another bandage around the outside, but try to keep it a gnats wotsit below the original surface. Once hard rub gently to get a smooth even finish..  
glass cloth shown in blue  

Filler now applied

Now the fun bit, mix up filler and spread it as evenly as possible....when it's set get a long sanding
block and sand to shape

Phot showing stage 2 with the fishing rod inserted and stuck back together

 Photo showing stage 2 completed with the fishing pole inserted and stuck back together

Finished repair

The finished job, only the missing seam shows it has been repaired

A happy customer!

Chris Boosey in Andy Westgate's workshop with his repaired MiniJ

Further reading at http://www.fibreglast.com/contentpages-Learning-Center-123.html

Back to Tips Page